
Most product roadmaps are terrible. A lot of time and energy is spent creating and maintaining them, but as most product managers know, they are pretty much obsolete after about three to four weeks. In our experience, we have found three reasons why roadmaps tend to be so brittle:
- Misunderstanding on the true purpose of a product roadmap. A roadmap is a communication tool used by product leaders to develop alignment on how to direct limited resources towards the organization’s goals. Unfortunately, most people view roadmaps as fixed schedules listing specific functionality that will be delivered by a certain date.
- Unilateral creation. The best product roadmaps are created collaboratively with all the relevant stakeholders who are affected by the product, have insight into the market or have resources to share. Sadly, many product roadmaps are created in isolation without the participation of key stakeholders — sales, development, marketing, architecture, executive leadership, and representatives from key customer accounts.
- Roadmapping is an infrequent activity. In our experience, the best roadmaps align with the standard rhythms of the business — quarterly or monthly. Roadmaps that are only updated once, or twice a year, quickly become out of alignment with the market and customer needs.
To address these issues, let us share our collaborative roadmapping process with you.
Formula for a Strong Product Roadmap
Time Needed
4 to 8 hours
Participants
4 to 25+
Outcome
A detailed product roadmap
What You Can Learn
The organization’s short- and long-term product development and go-to-market plans.
What You Need
- Large wall or whiteboard
- Rolled paper, at least three feet wide and at least six feet long
- Post-it notes, multiple colors and sizes
- Sharpies and other markers
- Yardstick, or meterstick if you prefer metric
- Tape, preferably blue painter’s tape
- Yarn, string or ribbon
- Any other preferred supplies for in-person collaboration
The Process
STEP 1: MAKE A MATRIX CUSTOMIZED TO YOUR ORGANIZATION
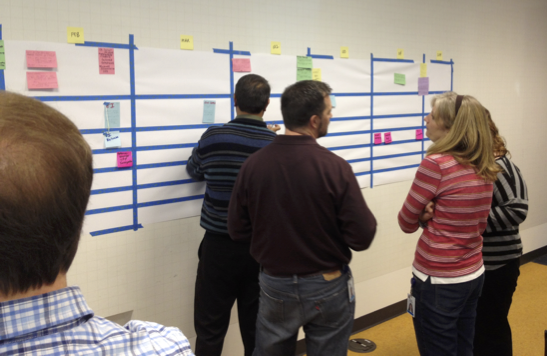
Begin by hanging large sheets of paper on the wall. Give yourself at least fifteen feet of horizontal space to work with. We recommend using rolled paper at least three feet wide. Then, using your yardstick (or meterstick) and a marker, create four columns and at least five rows. This grid will capture the contents of your roadmap.
Label the columns “Recent,” “Current,” “Near Term” and “Future,” from left to right, to represent time. Label the rows “Market Map,” “Features & Benefits,” “Technical Architecture,” “Market Events & Rhythms” and “Schedule Milestones,” from top to bottom, to capture the important content that will be the basis for your roadmap.
![]()
Feel free to delete rows that do not make sense to your domain. Also, if you feel the need to add from one to three rows that represent unique areas of your business domain, go ahead and do it. For instance, some of our clients add rows for regulatory activities, manufacturing cycles, security, training, and/or key partner milestones and events. In our experience, the goal is to have from four to eight rows in your roadmap.
Likewise, feel free to choose different time intervals for columns. For example, one of our clients labels the next three months as columns, then three more quarters as columns and a final column called “beyond.”
Before you begin adding items to your roadmap, distribute different colored post-it notes to each department leader — sales, marketing, engineering, etc. Be sure to note each department’s color by creating a small legend and put that off to the side.
STEP 2: FILL IN THE MATRIX
Now, invite your cross-functional group of participants to add post-it notes to the “Recent” column for items their departments have recently released or completed. People may work individually or in groups. Everyone’s department should post at least one item, but not everyone will post in every row — that is OK. After all the departments have posted at least one item in the “Recent” column, taking anywhere between ten to fifteen minutes, take a few moments to celebrate and recognize the accomplishments.
Next, move to the “Current” column and invite the participants to add more post-it notes to represent all the work that is currently in progress for their department. At this stage, people will be posting in multiple rows and, depending on the nature of their work, multiple items in a single box. This data entry stage usually takes from thirty to forty-five minutes.
Once all the raw data has been captured, ask for a volunteer to briefly explain what their department added to the wall. Be prepared for some surprises as people learn for the first time what the other departments have been doing. There may even be some discussion between the participants as they seek to resolve any issues which will enable better synchronization. We normally reserve at least thirty minutes for these conversations and adjustments to the roadmap.
Continuing on, encourage the participants to move to the “Near Term” and “Future” columns. Repeat the process of adding post-it notes by beginning with the “Near Term” column. “Near Term” is often defined as within the next three months. However, you are free to increase or decrease the number of months to something that makes sense for your product, market and customers. Everything else goes into the “Future” column.
Here is an example of how this works in action: Sales adds a post-it about targeting a particular market segment as a new opportunity in the “Near Term” column. Product asks about the needs for that new opportunity, identifies a capability gap in the product that requires research now to validate the need across customers and adds a new post-it to the “Near Term” column. Engineering then sees an unmet architectural requirement which they also add as a post-it to the “Near Team” column. Marketing realizes an opportunity to promote the new capability more widely at a trade show and puts that idea as a post-it in the “Future” column. All of this becomes much more clear through the interaction of all the people participating in real time.
For this stage, we recommend reserving from thirty to forty-five minutes to allow people to move post-it notes back and forth between “Near Term” and “Future.” Again, the dialogue is all about giving the participants enough time to work out realistic expectations and whatever coordination is needed between their departments.
STEP 3 – LOOK FOR GAPS
When people have stopped adding items, ask everyone to step back from the wall and review what has been added. Now give the participants plenty of time to identify any questions or doubts they might have and offer any explanations about the content (usually about twenty to thirty minutes). Once all the content questions about the “Current”, “Near Term” and “Future” post-it notes have been asked, and resolved, by the participants, ask the group these questions:
- Based on our recently completed and current work, how realistic is our near term plan?
- What else do we need to add (or discuss) in order to align our product development and product launch/go-to-market plans?
- If something unexpected (or unusual) were to happen in the near term, what would we defer to the future?
- What obstacles could prevent this plan from succeeding? What could we do to mitigate those obstacles?
STEP 4: SAVE THE RESULTS
Be sure to make notes about the answers to these questions and any other topics that arise. Plan about forty-five minutes for this discussion. When the last conversation has ended, ask everyone who participated to sign the product roadmap and take pictures of them standing in front of their work!
Within the next forty-eight hours, we recommend converting the roadmap to a digital format like Visio, Excel, PowerPoint or whatever format makes sense to you. Be sure to save the physical product roadmap, or hang it in a common area, until the next roadmapping session to compare what was planned to what actually happened.
Product Playbook: More to Come…
We identified the need for a Product Playbook in our first article in this series, Product Playbooks: Why You Need One. This is our second article in the series, and in the following weeks, we will continue to share more step-by-step instructions on how to use some common frameworks to inspire you to create your own winning Product Playbook. So be sure to come back and learn more!